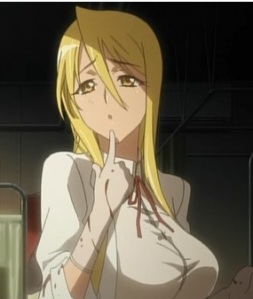
Tangled in an Idea

Hi guys, first of all I just want to apologise for the fact that I probably won’t get a diary blog out about my Ghibli dress this month as I am in the middle of sorting out the house after a big move. But I didn’t want you all to go without something this month so I decided that because I got all the materials in the post and I bought a new glue gun today I would do a blog about making a tiara for my Rapunzel cosplay from Tangled.

My cosplay is actually the normal purple Rapunzel dress but I have made a cape trimmed with a gold pattern similar to the pattern on the skirt of the dress and I made a custom set of shoes, oh and I’m wearing the short brown hairstyle like at the end of the film.

At first I wasn’t going to bother with a tiara because as Luna Hawke pointed out to me she only wears it (brown hair + tiara) for one scene at the very end of the movie, but i decided to give it a go as I couldnt get one from the Disney Store so this is my blog about how I made it.

Scene at the end of the movie


This is the image of the actual tiara that I used for my reference while i was drawing my template

First things first is what you are going to need if you want to give it a go
– A strong craft wire
– Craft foam
– Gold Spray Paint
– 1 Larger tear shaped gem and 2 slightly smaller (size of your choice)
– 8 small red gems
– 4 small blue gems
– Large bag of fake pearls
– scissors and craft knife
– Hot glue gun

So the first thing I did was make a metal halo. I took a length of wire and bend it around into a circle and kept trying it on my head so that it sat nicely around the back of my head and perched at a nice height on the front of my head. After getting it the right length after a few attempts at making it larger i cut the wire to size, bent the ends in and interlocked them and used a little hot glue to make sure they don’t come apart.

Metal halo that fits my head 🙂

Next I measured from the middle of the halo using a sewing measuring tape to where i thought i would like the front of the tiara to end, in my case i made it seven inches either side of the central point on the halo. Then I got some paper and drew out a 14 inch line and marked the middle. From that I drew the slightly cured bottom line like on the reference image and took one of each gem and one pearl as a size guide to draw out my template. Using my reference image, which was the Disney Store tiara, I started to draw (from the middle) the main gems onto my line by tracing them.

Draw a rough bottom line like the tiara has including the curve that goes up to the centre


Start to trace your gems onto ur tiara using your reference image at all times to make sure they’re all in the right place


Once you have drawn out one side of your tiara pattern you can fold the image in half and trace the other side so both match perfectly. Once you have done this you can cut out the sections that need to be gone and trace those onto the other side and cut those sections out.

Fold in half your drawing and trace other side


I filled in the sections that needed cutting out in blue

It should start like this….

Half cut out sections

And end up like this all cut out and ready to trace onto your craft foam 🙂

All sections that should be gone should be cut out 🙂

Next trace it onto your craft foam, in my case I cut out 3 of them as my craft foam was pretty thin but if yours is quite thick and sturdy then I would just cut two. I cut one out just like the template with all the sections missing and the other two with the main gem parts not cut out. This is so my gems can be recessed into the tiara.

Trace onto craft foam


You should be left with your craft foam cut outs 2 or 3 depending on the strength of ur foam

Take the front foam piece (the one with all the neccesary sections cut out) and glue the bottom of the wire halo to the bottom of the foam tiara piece. Then you want to take the back piece and make a sandwich with the wire and push the back onto the front

Glue the wire to the bottom of the front piece and then sandwich the wire in between the two pieces glueing it in place

It should end up like this

Foam sandwich around the wire all glued in place


The next thing is to do is paint it gold, but before you do make sure all the edges are nice and tidy because there’s no going back after this 😛 Use your scissors and knives to make sure all the edges are nice and smooth and how you want them and then paint!! PLEASE PLEASE PLEASE remember though all spray painting and glueing to be done in a well ventillated area!

Going back to your reference image and your template you can start glueing on all the gems like i did 🙂

The start of a million gems 😛


About half way through…… 😀

By the end of it you should be left with your tiara. From your original paper template to your gorgeous tiara that doesnt cost very much to make.

All of this doesn’t cost very much to make, all in all it cost me £2 for my tear shaped gems, £2 for the foam, £1 for the paint and a couple of pence for the glue and the wire was free for me but its not very much in your local craft stores.

FINISHED!!

Now I have a Rapunzel tiara that fits my head perfectly! It doesn’t move when i tilt my head forward as its held on by the dip in the back of my neck and it doesnt fall off backwards but if you have issued with it slipping it can be held in place with some hidden bobby pins down the side of the wire halo. I hope that this tutorial will help some people with their cosplays. Happy cosplay season everyone! ~ Otakugirl

Back to Basics and In-time Intermediates

When making a cosplay it is really hard to know where to start.  But really you have to know what you’re going to need to know to create your masterpiece!  My back to basic series will involve all sorts of basic crafting skills you may want to learn and practice and then we will move onto “In-time Intermediates”  Which will involve more of the heavier things in detail, this will yes indeed have me practising my own skills and even learning things so I can write about it for you.  Why am I not writing about cosplays? because I personally am taking a year out of conventions, I’m doing something else this year which has kept me just as excited and yet I still wanted to contribute to JustCosplay, I felt this the best way to do it and for our readers to still get something out of it all, alongside some spectacular interviews to come.

Here are some of the things I hope to cover this year if you would like me to cover anything at all please put it in the comments below, on our Facebook page or e-mail us at justcosplay@hotmail.com

Back to Basics:

What’s in the box? 
– The basics of a cosplay making kit
 
Is it sew simple?
– Sewing, Hand sewing to machine sewing
 
Pattern? But what is it?
– What are patterns how to use them
 
Fabric is Fabric right?
– Fabrics, all you need to know!
 
Hems? Bias? Pleats? Darts?  What?
 – Sewing names and terms what they are and what they’re for.
 
FOOOOOAM! A cosplayers best friend?
– All the kinds of foam, how to identify them and what to use them for
 
Thermo-what?
– Thermoplastics, what they are and how to use them
 
Wigs, A Cosplayers best friend
–  History of wigs, How to identify a good wig, What are wigs made from
Maintaining your wig, Styling and Wefting
 
Finishing touches!
– Painting, varnishing and sanding, how to make things appear how you want them.

In-time Intermediates:

Images with a needle and thread 
– Embroidery, Like sewing but lots more to it!
 
“This patterns not right!”
– Make your own patterns for all kinds of cosplay
 
I want to make ice and diamonds
– Resin, resin everywhere! How to make gems and all other items
how to give them the finishing touch other things and ideas you could use them on.
 
Wire me up!
– LED’s and Electronics, how to make it fancy, or keep you cool.

This is only a rough Guide of what is to come, Happy cosplaying! ~ Luna

Luna: Fenrir – Keyblade Commission start to finish.

Image

Following an earlier post made by myself , I posted about a commission I made, well here it is the full final thing complete with work in progress pictures. This was the first fully wooden prop I had made all of it was had carved no power tools were used. You can see the Video In our “live stream” section on how the Charm was made for the end of the blade. It was made from Fimo, Which was still flexible enough so it didn’t smash when waved about/dropped/ hit the blade itself.

The Blade itself was made from Solid pine. Cost? £0 It was made from an old bed slat When i got a new bed, Recycling is the best way to go at all times! It took ages to Saw out, but it was worth it. The handle was made from an old broom handle i had used on an old art project which I dismantled as I didn’t want it any more.

You can see the tiny hand chisels I used.

Painted with poster paints and acrylics. The handles attached with a proper grove system nails and wood glue.

here it is on my lap During the event with other members of the Just Cosplay team and friends of the team.

Any construction processes if you wish for them to be explained leave a comment below and I will get back to you asap!

The Road to the House of Ballads

So for the upcoming MCM expo at the end of October which is in 2 days now I decided to do the House of Ballads armour set from the game Kingdom of Amalur: Reckoning the problem is I did something real stupid by leaving it
until the last minute really and I’ve literally only just finished it today (Wednesday). I like it but I wish I had started it a lot earlier and then maybe it would be up to the standard i wanted it up to. But anyway, I thought I would share with you a little of the build up to the finishing and give a little preview at the end 🙂

So the first thing I had to do was find some reference which was really hard. I could only find 2 pictures of this set, one of the female which was only a front on view and the male set which was the back and front views. This was problematic as they didnt show the side views, so onto my ps3 i went and loaded up the game so that I could take lots of pictures of all the different angles. So below is basically what I was hoping to end up with or something close to it lol

The cosplay started life as a pair of curtains that my mum had laying around so I tore out the lining and started to make the base of the robes. For this I used a coat pattern and modded it to be what I needed. I also cut a long strip of the green which later became the second collar. To the base robes I added 2 strips up the front and then came the not so fun part. I had to paint all the details on by hand, first all of the gold went onto the robes which took forever, then I painted all the leafy parts on to the robes. I got a yellowish gold table runner
from the charity shop which I cut up and made into the base collar, which i trimmed with a dark green ribbon and painted yet more gold detail onto.
I used the last of the table runner to make the cape, which i cut to shape and made a shield shape out of the green fabric remains and painted the House of Ballads crest onto it. I trimmed the belt with a little bit of craft foam here and there to make it more like the reference pictures. So below is what I had basically ended up with about half way through my build.

I had never used craft foam before so I wasn’t expecting my cosplay to look all that great lol but I used more craft foam to make the gauntlets which i secured to a fabric wristband so that i could undo and redo them really easy and the craft foam on the boots I just sewed on. Again I wish I had left myself a little bit more time to make it into what i really had in mind, but I do like the end result, its not too bad really. I can always redo the armour bits when I re-wear the cosplay.

So i had finally finished the robes and the armour bits, but I wanted a weapon set to go with it. Now I couldn’t go for this particular hammer I was eyeing up as I would have been thrown out of expo for it lol so I went with my favourite weapon the Chakrams. So I grabbed my Captain America shield and drew around it so I had a nice big circle onto a cardboard box, from that I drew the blade parts on and cut it out and I did this twice. I used paper mache over the cardboard bases to smooth them out and I sprayed them silver. For the handles I wanted to use leather, but the real stuff is expensive so I went to the charity shop and I bought 2 really wide belts. Unfortunately I couldn’t get 2 that were exactly the same colour but I kind of like the different colours in them. I cut the two belts in half and in half again so that I was left with several strips of fake leather, I wrapped them around the handle parts and glued them on with my hot glue gun in the pattern that I needed. Using craft foam I cut out the fancy parts that were on the blades, sprayed them gold and glued them in place and using a green paint I coloured the middles of the craft foam parts.

My character has nice bright red hair and this time I decided to just re dye mine instead of using a wig, and she also has a tattoo on her face, which wasn’t fun to put on as I had to draw it on myself in the mirror so it was all backwards and squiggly but I think the end result is ok. The only thing left to do after all this was team the cosplay with my brown leggings bought especially and it was finally done!! I couldn’t believe it, I didn’t actually believe that I would get it done in time. But even though the end result could have been better I am pretty happy with it and I hope everyone else likes it.

Hope to see all of you at the expo at the excel in a couple of days and I hope you all enjoy it ^_^ ~ Otakugirl

How to make a cosplay accurate: Detailing!

I think this is probably the biggest problem of any cosplayer. How can you tell how big all of those details on your cosplay should be? How can you get them off the reference onto your cosplay?? And how do you even go about getting it accurate???

Today’s examples will be my Epilogue Syaoran, artwork Watanuki, Syaoran Li and Asch cosplays!


Depending on what the detail I’m trying to do is, I go about doing them in one of four ways. I’ll run through them one by one.

 Some detail designs can be really complex and if you’re like me, then I wouldn’t want to risk trying to draw them because it probably wouldn’t look anything like it does in the reference! So what can you do? Well, for my artwork Watanuki cosplay I used my trusty paper pattern! Now, this isn’t any old paper pattern. Because I want it accurate as possible I have directly ripped the design from the reference! You can’t get anymore accurate than the reference itself can you? 🙂 You can use any old image/photo editing software for this: Photoshop, GIMP (it’s free!) or even paint. All you got to do is isolate the part you’re wanting and make it bigger!

What’s that you say? What if I can’t see all of it? Never fear! This is where your image editing software comes in again. With my artwork Watanuki cosplay, for the arm detail you could only see half of it. (Well, you could see a whole one, but it wasn’t symmetrical due to it being a side-ish view) So all I did was take that half, copy/paste it and then flip it. Carefully put the two halves together and you have one whole!

A more unconventional method I do is actually measuring the detail on a reference. I know it sounds crazy, but it’s how I did all of the details on my Epilogue Syaoran cosplay. It’ll only really work though on details that are straight blocks (I think. I’ve never tried it on anything else), so bare that in mind.

I have the Japanese artbook that contains the Epilogue Syaoran artwork, so I assumed this is the actual “proper” size the image should be. One day I was trying to figure out how big to make all of the green parts and thought “What if I got my ruler, measured it and scaled it up?” And so I did! From the part I measured, the cape green parts were about 7mm. I like to keep to whole numbers so I scaled it up to 7cm, made a paper template and had a look to see how it looked. You know what: it looked spot-on! So to keep everything consistent I kept with the same scale. So the green on the collar was 2mm: ended up 2cm, bottom of the top was 5mm: ended up 5cm etc.


Following on from ripping a design/detail straight from the reference and depending on whether you have the right programs for it, you can copy/trace the design on the computer. I’ve only been doing this since I’ve been my on graphic design course because I acquired the right program: Adobe Illustrator. Illustrator is very suited to this task because it is a vector-based program. This means it’s designed for drawing objects and then scaling them without losing any of the quality.

I personally like using this method since I can trace the design directly off a reference and then clean it up, remove any inconsistencies and then most importantly: I can make it perfectly symmetrical (if that’s what it should be!). I’ve used to this draw all of Syaoran Li’s details and for one of my future cosplays – Asch from Tales of the Abyss.


And finally, sometimes, when you can’t do any of these other options. You just gotta do some trial and error! This is where paper templates are your friends! (Yes, I know I like my paper templates, but I really do recommend them!) Never cut a template out of your real fabric if you don’t know if it might not be right. Get it right on paper first!! I have so many paper templates that I’ve now had to organise them in poly-pockets! My latest templates are for my Syaoran Li cosplay. So far I’ve got a big template for the hat (and all the details on it), the collar details and each of the designs I drew on Illustrator. These, as I said above, are trial and error in terms of how big you make them. I cut the hat down in size about 4 or 5 times before I was happy with it and I made 2 collar templates before I got the right one 🙂 So don’t panic if it’s not right the first time.

 And that’s it! I people would like, I could do a step-by-step tutorial on how to rip images directly from a reference. Just let me know!


Question the Bloggers #3

Our bloggers were asked: What is your Dream cosplay, and how would you go about making it if you didn’t have a budget to worry about? And how would you go about it if you did have a budget to worry about ?!

These were their replies:

Mithril:

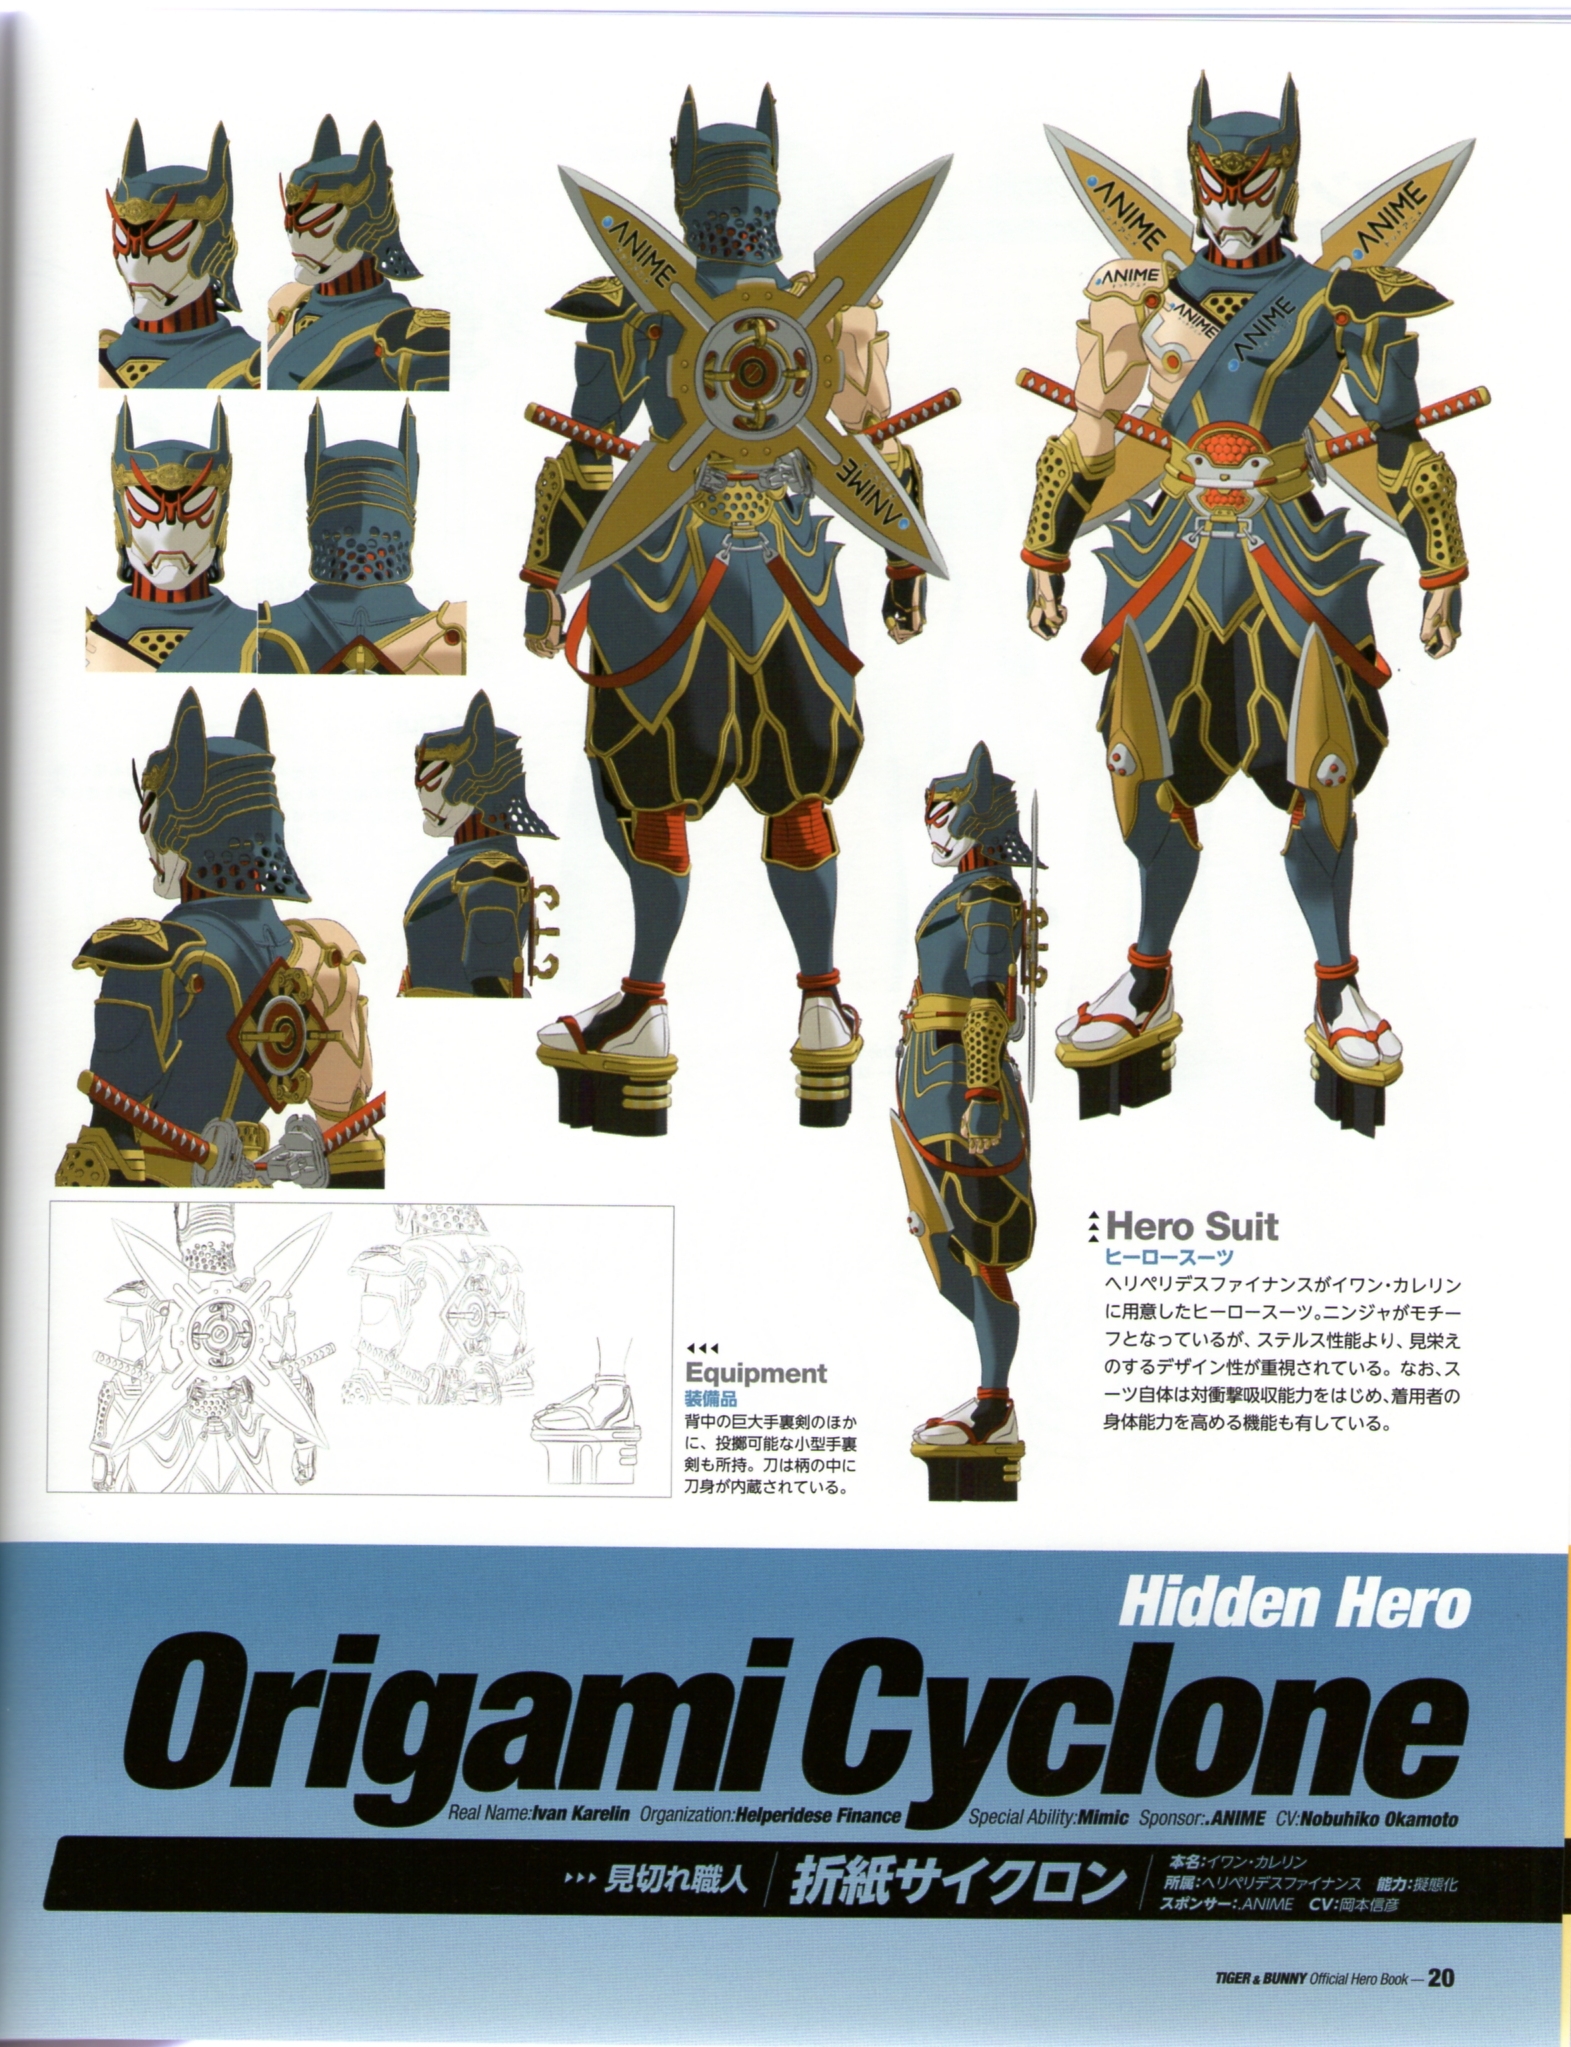
Origami Cyclone from Tiger and Bunny, unfortunately I haven’t got the foggiest on how to tackle it, probably craft foam covered in fabric. Oh and some crazy woodworking skills to do those getas, I will probably spend a whole month learning how to walk in those

OtakuGirl:

Mine would be Danielle de Barbarac’s ball gown from the film ever after. This dress has so MUCH bead work on it and those wings are so pretty. If i had an unlimited amount of money i’d be looking at crystals and vintage beads and such to sew onto the thing and i would buy myself some really fancy lace and try to do one of my fav films justice

Pandora:

The classic Dino Megazord from Power Rangers is my ultimate cosplay dream. If I had an unlimited budget (money and time) it would probably involve carving foam padding and covering with latex (like LARP props) for the bulk, and thermoplastic for the helmet and details. On a tight budget it would be cardboard boxes, chicken wire, and paper mache.

Luna:

My Dream Cosplay, I have so many i would love to do, but that’s a cosplayer all over right?  I think the one I would really love to do though is the Tempest Spirit from Aion: The tower of eternity. I’ve had this on my to do list for a long while.  If i had no budget to stick to I think i would go for a mix of Wonderflex, worbla and polymorph to get the right effects i want, with Acrylic plastic to make the see through pieces the shoes would be hard but I’ve seen people make something similar recently which i would probably follow.

Tari Telrunya

One of the many I would love to do but one of the hardest  getting accurate fabric is not always cheap so if i had the money I would search out the perfect fabric trim etc

Lady Bahamut

My dream cosplay has always been The Prince from Suikoden V. However, I have no idea how I would go about it! Or to be more accurate: I wouldn’t know what to make that brown belt… thing around his waist out of, nor would I know how to do all of the detailing on it and the top/vest above it. I just don’t know enough techniques yet but one day, I will!  What I do know though: it isn’t a cosplay that can be done on the cheap! Nor would I ever do so, it is my dream cosplay after all 

Luna: Sona Cosplay Wig Tutorial!

As a request i was asked to write a more detailed description of how i made my sona wig, to be honest there wasn’t much to it at all so i really hope what i write in this short tutorial will help all those who want to achieve a similar gradient look regardless of the character and hair style, without the need for dying your wigs with sharpies or ink risking the colour mixing and not getting the look you wanted in our case Sona’s yellow ponytail tips going green.

To start off with I bought a simple “miku” styled wig with detachable ponytails, I also made sure it was a lot longer than a normal wig i think this was 100cm long!  Unfortunately when it came it was tangled and a mess.  This was however and is easy to solve, Just start brushing from the bottom of the wig and work your way up to the wig cap! this solves a lot of issues with Frizzing and fraying and tearing the wig.

The second part of the process involved two tie in ponytails, that’s exactly what I searched.  these tie in ponytails are perfect because you can use the wig multiple time for different costumes and still be able to remove and put the yellow back in.

Once brushed its Ready to start! this is the full length wig without styling.

I measured the length of my yellow tie in ponytails and cut the wig so it was 1-2 inches shorter than them. this seems like a waste but don’t worry it’s not, dont throw away the cut off’s you will need them! This was not a heat resistant wig, however the bottom curled up, straightening was required. I tested my straighteners on a spare piece of cut off first to see what heat i could get away with. a low heat “touch hot” for me was the best way to go. If you are using straighteners remember to test it first and do a little bit at a time for the best results.

Once Straightened i opened up the ponytail clip and tied between the blue wig fibres the yellow ponytails. They have a clip on them so I just pushed the clip in the netting at the base of the ponytails to hold it in place whilst i tied it in place. I followed up by cutting and trimming upwards into the blue to give a faded blended look rather than an immediate colour change.

When I tried on the wig, I felt it didn’t have Sona’s poofiness, and you could see the joins of yellow at the top. Remember those cut off’s from earlier? this is where they come in!

Time to make Wefts! Although i don’t entirely advise you make them how i did but i felt this was the best method for myself. there are many many many tutorials online on how to make wefts, find one that suits you best and use that.

I used some cut off’s of fabric from my Sona Cosplay dress.  I made a straight piece rolled it up like i would a hem.

Once I done this I laid the wig fibres on top and fed it through the sewing machine.  I trimmed this straight afterwards. Keep adding wig fibres bit by bit until you are happy with your weft thickness, I made mine really thick only because I did not add them into the wig itself but i added mine to Sona’s Hair pieces, gluing them on the inside so again i could remove them for easier transportation, and so i could use the base wig again if needed.

Then i clipped it all together  styled the bangs, and hey presto one sona wig i was chuffed with. I always find that you should play on peoples tutorials so if you find something that you found worked a little better leave a comment below.

I really hope this helped those who wish to make their own gradient wig without the use of dyes.

Lady Bahamut: How to make a cosplay accurate: Where does everything go?

I know this doesn’t apply to everyone and sometimes it’s just not possible, someone may not have the skill level or the tools to do it, but I like my cosplays to be as accurate as I can get them. It’s something that is important to me and will always continue to be. So I thought it would be nice to write a little series on how I achieve this! What’s that you say? “I’m not the same body shape/type/weight as X character?” That doesn’t matter; this is all about making it accurate for YOU! 🙂

I’m going to be using my Epilogue Syaoran cosplay as the main example for this tutorial today!

Firstly, you need to gather your references. I would suggest however that you have one master reference, as if in the case of CLAMP, your chosen cosplay won’t look the same in every image! The image above was my master reference as it showed off most of the costume. Although sometimes you’ll find that some details/whatever just don’t work. So for example: a detail may be an oval in one image (in say, your master reference) and a circle in another (in other artworks/in the manga/anime/the artist being inconsistent). You try to get the oval to work but it’s just not happening… but the circle does work! This is okay to do, what works in a drawing may not work in real life no matter how much you want it to! So don’t be afraid to mix and match which reference you use if you need to.

I also suggest that you look at what other cosplayers have done. What have they done with the cosplay? Do you like what they’ve done? Anything you don’t like? What would you do differently if you had made it? This infact can be your most valuable source as you can judge what works and what doesn’t on an actual person. I can give an example on this for the cosplay I’m currently making: Syaoran Li (battle outfit) from Cardcaptor Sakura. I looked at a lot of other cosplayers and the one thing I found that could make or break the cosplay for me was his hat. I found that some had made it too small or simply hadn’t got that curved shape to it. So this is something I will absolutely make sure I get right!

So you have all of your references and have had a look at other cosplayers. Time to start working this thing out! You first need to make (or modify if you’re not making from scratch) the base top and trousers. Look at the reference closely, how does it sit on Syaoran’s body? The top is pretty fitting (which is unusual for a male outfit) and the trousers also start out that way, but end up being a little baggy when it connects with the boots. The very bottom of the top ends (this means the green parts) just above the crotch, but under the waistband (as it cannot be seen) of the trousers. So somewhere in the middle of these two points. I recommend judging this end point on one of your own trousers, it’s easier that way 🙂 I know there’s that notch at the bottom of the top, lets worry about that later. Get the overall size and fitting right first!

So here’s how my top looked at first. Urgh! Horrible! Lets fix this. It’s not remotely fitted and it’s too long. So I took it in at the sides, put a dart in the back and folded the bottom up to where it should be (that middle place between the crotch and trouser waistband)

Much better!

TOP TIP: DO NOT. I repeat! DO. NOT. Cut ANYTHING until you are 100% happy with it. I always fold edges up/over (like I have with the bottom and sides of the top) and pin it there until I am happy with it. If you’re still unsure, just cut off a little bit at a time until it looks right. Because if you cut something off and you then decide you’ve cut off too much, it’ll be too late!!

There can also be the issue of what I call “floating details” that aren’t connected to the edge of the garment. In relation to Syaoran here, that would be the green detailing on the upper leg. Where on earth exactly does that go? Again we have a common point of reference here. The top of it is below the crotch, above the knee. So this is where it needs to go!

You need to judge where everything else goes this way for your cosplays. Where it is sat on his (or whoever you are cosplaying) body in accordance to yours. That way you can never fail! I know all this may be stating the obvious, but I think this is something that can be forgotten in the bigger scheme of things.

Next time: How to get accurate detailing!

Goldie Neko: Getting to Know

Getting to know you . . . how can one begin?

Well the basics, I be Goldie Neko!

A London based Cosplayer of the past several years, who caught the bug back in 2008 at my first MCM Expo. Since then I have striven to learn anything and everything I can possibly get my hands upon to help me expand my skills as a Cosplayer. Most people may have seen my Black Waltz No.2 cosplay and perhaps even my Winifred Sanderson. Much like all Cosplayers I know I am quite ambitious with my projects and always strive to go that little bit further to ensure I can come up with something truly worth while!

My love of performance and theatre is very deep set from when I was barely 10 years old and my love for Cosplay was almost instantaneous upon discovery due to it’s whimsical theatricality! As my love of theatrics was nurtured alongside a passion for manga and anime throughout my late childhood and adolescence. In the world of muggles I serve people on The London Eye. I am praying and working as hard as I can so that one day I may well be able to say I work in theatre and/or with costumes for a living!

All of the best things in my life I have to say I owe to Cosplay and the fantastic people I’ve met because of it. Here’s hoping that I shall continue to explore to wondrous world of Cosplay and I pray that you dear reader shall be there alongside us Bloggers at JustCosplay as we embark upon an epic quest of life, madness and cosplay together!

Buckle up and hold tight to ya buns kids! THE MADNESS STARTS HERE!

OtakuGirl: UpCycling to Cosplay

UP CYCLE YOUR WAY TO COSPLAY

I know things are tight money wise for a lot of people nowadays, heck even I find it super hard to afford it sometimes what with only working part time. But I have a couple of ways that people can cosplay on a tight budget and still get great results. Both of these ways I use a lot and i will illustrate both with pictures of what i made with them.

The first is to upcycle something old. Obviously depending on what character you want to cosplay depends on what you’ll need. When i wanted to cosplay Jill Valentine in a tactical uniform i had pondered the use of a real tactical vest, but as so very often happens i was hit with bills that i had to pay leaving my cosplay budget pretty weak. So my answer to this was to upcycle. I went to my local charity shop and i bought a zip up body warmer that was black. This only cost me £3, it looked something like this (unfortunately I couldn’t find
any before pictures).

I bought some luggage straps from the local camping shop and then i began to mod. I took the long zip out of it cut it down so it sat just under my chest (I wanted a small half tactical vest for my design) then i re stitched all the edges and then i sewed the straps running all the way around the jacket back to front so that the clips were in the center at the front, leaving a slight gap so my tee was visible. I sewed a couple of loops out of the straps and attached those so that i could clip my walkie and my badge on. I sewed a small square of leatherette (which didnt cost more than £1) to the back and then i had a decal made from eBay which was only a couple of pounds
and attached to the back and then i had a very cool looking tactical vest for under £10 which is really cheap considering the alternative, and i got a really good response to this costume, one person even said that I was the best resident evil cosplayer they’d seen which made me smile at the time. The rest of the costume was also from upcycling old things, i used an old black tee and sewed some patches the shoulders, a pair of black combats, and a beret all from charity shops, things i had or was given a long time ago. The whole costume cost like under £20 minus the boots, which i couldnt get in a charity shop they cost me £9.99.

Another example of where i have upcycled old clothing into a costume is in the form of my Ryofu Housen cosplay. Again i went to the charity shops and bought a red blazer and a pink plain skirt. Then with the jacket i changed the buttons and painted the collar part black that needed to be. With the skirt all i did was paint the red lines on with fabric paint and there you have it! I had another great cosplay for less than £10.

This is a great way to make cosplay items for a fraction of the price. But I know that you are not always going to be able to find the item of clothing that is needed to modify into your cosplay, which is why I use my second method of upcycling a lot. BEDDING! Charity shops have a lot of great bedding that sells for really cheap and this can be used to make your costume. Its not just for costumes though, i have used this method to make casual clothes that i wear on a daily basis.

An example of this upcycling is one of my very latest cosplays that i wore to the MCM expo in London thats just gone. My Poke ringmaster Penelope cosplay. One lovely girl even came up to me and my sister at the expo and asked us where we got the fabric to make the costumes and we told her the same thing then, BEDDING!

The dress and the waistcoat were both made from bedding, the dress i just belted and the waistcoat i put colourful buttons on it and painted the pokeballs on the tails and even with buying the plain black top hat and polestyrene balls to make the pokeballs this whole costume also cost less than £10 to make. Even the pikachu on the top hat is upcycled from an old one that was bought from a charity shop. So with this costume it was just a little imagination designing a character and making the cosplay from the bedding. You could get the bedding and make it into the character of your choice from the well known anime, manga etc that you wanna cosplay from. Or like me in this example i found the bedding first and then designed the cosplay around it, which was also fun to do.

all of the costumes above are all ones that i have made by buying old bedding or using old bedding that i already had and making into cosplays.

What i am trying to get at in all this is that even people on a tight budget can create something amazing from something old and no one is none the wiser. Everyone out there has an old tee, or dress, or some old bedding, old hats and old accessories that they can take and with a bit of creativity and work can turn them into cosplay related items! I do it all the time and if you cant afford to buy fabric off the roll its a great way to make what you need on the cheap. I hope people will consider it and give it a try if they are on a budget. I love to see it when all cosplayers come together. I hope this might help some people out there and I hope people have fun trying this.

Lets Question The Bloggers! #1

I thought it would be fun to randomly select Cosplay Questions we would usually get asked or ask others when it comes to cosplay, and ask them to our bloggers, so this week I asked a simple Question:

What’s the first step you always take when making a cosplay, and why?

Goldie Neko

My first step for starting out Cosplay is pretty much the same thing. Get me reference out via official art, screen shots fan art ect. Though admittedly if my heart and head is really in a project I’ll have drawn it in my sketch book during this first step as well.

Stubbled Grapes

Gather all the references I can find of different angles, including other people in cosplay if I particularly like what they’ve done or if there aren’t many normal references. Then search eBay for some of the more obscure items. Then, if I need a pattern I’ll decide which to use, else I’ll mass buy fabric to make sure I have enough for mistakes.

Ryzy

Trying to come up with an idea, and then talking about it with my Friends and Girlfriend to see if it would suit me or not.

Pandora

My first step is to find and save as many pictures of the character as I can. Official art, screen shots, photos of toys/action-figures, photos of cosplayers dressed as that character, even fanart. I need to be able to answer questions like “Are those kneesocks, or high boots?” or “Is that a hair accessory or her ears?”

OtakuGirl

Trying to decide out of the hundreds of things i want to cosplay then once I have picked i usually make the accessories before the costume so I would be scouting out materials to make the prop for that costume

Luna

It’s always hard to decide what should come first, deciding on a cosplay or rummaging for references, but once i have decided References and tonnes of them and to make sure i stick to them all the time during creation, with references comes sketches, i dont think there’s a prop i haven’t yet drawn out before creating it!

If you think you have a great question for our bloggers Don’t hesitate to E-mail us at JustCosplay@hotmail.com or contact us via Twitter or Facebook!

INTERVIEW: Shamasus Costumes

We had the privilege of meeting Samuel Levine, the owner of Shamasus Costumes, at May Mcm Expo after seeing him on the Saturday masquerade  Seeing his craftsmanship and quality of his costume we asked him for an interview for just cosplay and here it is:

Thank you for accepting our interview request for Just Cosplay. First of all how did you get into cosplay?

It was way back when I was in 6th form, looking at some cosplay pictures online when someone I hadn’t met before came and spoke to me about it. We started talking, got introduced to a few more people and eventually started cosplaying for some charity events around the College. From there I was invited to go to MCM and have been cosplaying ever since.

How long have you been cosplaying for?

I think my first one was near the end of 2006, but the first cosplay I made from scratch was in 2008, before then I was mostly altering existing clothes to fit characters or just making small parts for the costume.

We’ve all got to start somewhere. What is your favourite part about cosplaying?

I’m not sure I can really select a favourite part. I love everything about it, making the costumes are incredibly fun though insanely stressful at times. Meeting new people is always nice and of course posing for photos and having people compliment you on your hard work is such a great feeling.

It is also a good feeling when you make someone happy just be cosplaying a character they like and may not have seen before.

That’s fine I understand it’s sometimes hard to pick out favourite parts of a hobby. I wondered how do you start your costumes. Do you start of by sketching various parts?

It depends entirely on the costume I am making. If there are parts I have made before such as a pair of trousers I will tend to make that aspect first just so I have something done. For more experimental things such as my most recent cosplay I made a pattern on card and then taped it together so I had a 3-D version before I used the real material.

Speaking of your most recent costume, what inspired you to cosplay Nobunaga Oba from Sengoku Basara?

This costume has been planned for quite some time now, me and some friends saw the series a few years back and decided we needed to do a cosplay group for it. It was pretty much the rest of the group who said I would make a great Nobunaga, I had no reason to argue with this and wanted to try making some armour.

How long did it take you to complete it?

I started working on the chain-mail back in December. However, I ended up taking a few months break from working on it. I would say about three months working on and off on the weekends would be roughly how long I spent on it.

Weekends are great for cosplay work aren’t they. For this costume you’ve used metal for the base of the armour, what made you choose this material?

I was initially going to be using plastazote hardened with fibreglass, unfortunately I ordered the wrong thickness of plastazote making it incredibly difficult to work with as the shape kept changing. My neighbour works at a printing press and mentioned he could get a large amount of sheet metal for me for free. Already having spent money on a material I was unable to use I decided I may as well just go for the free metal and see if I can work with that. That and it makes a fantastic sound when I move.


We all love freebies! Was there any specialist tools needed in order to work with the metal?

Probably would be if I were to heat and hammer it into shape but for me the main tools were an ordinary pair of scissors, sandpaper, rivets and a hammer.

If I had some specialist metal working tools I could have probably saved myself some time and money in the long run as any protrusion had to be made from at least three separate bits of metal glued together then hidden with car body filler and sanded down.

What was the best thing about working with metal?

It was a fun experiment getting to work with a new material, I probably will never use it for cosplay again, at least not sheet metal to make a full suit of armour, far too many cuts from the sharp edges meaning far too much sanding had to be done.

So would you recommend metal for things such as accessories rather than a big armour project like yours?

Yeah, I wouldn’t mind using it for some small things again, the face guard I feel worked quite well. As the metal acts pretty much the same way card does I knew that if the card prototypes I had made worked then the metal versions would work as well. Also for the gloves, because the metal is very sturdy none of the detail on my gloves got warped during the entire weekend.

That’s very handy to know as more and more costumes having things like metal gloves. How did you attach the armour to your body?

Once I had made, shaped, detailed and painted each piece of armour I dyed some leather, cut it into strips and riveted it onto the armour with some buckles. Then it was just a matter of doing up each buckle, I did have to get help actually putting it on as the chestplate restricted my movement so I was unable to buckle the armour on my neck and shoulders.


Even if it restricted your movement it was a very impressive costume.

My final question is what 1 piece of advice you could give a fellow cosplayer wanting to take their costumes to the next level and maybe partake in cosplay competitions?

I would have to say keep doing it as long as you love doing it and to not be put off by any mistakes you may make, you will only get better if you keep working at it. I loved my early cosplays, but looking back on them now I know I would be able to make them so much better because I know what I could do differently. If you see a cosplayer who you think is fantastic, talk to them, I am sure most people will be more than happy to give any advice that they can.

You can check out his progress picture and other projects 0n his facebook page: Shamasus Costumes 

Pandora: I Can’t Cosplay Because… I don’t have the time

Cosplay can be a very time consuming hobby. Sewing, crafting, painting, making alterations, and correcting mistakes can all take a lot of time. And if you are raising a child, studying for exams, working full-time, and running a household, you may not have all that much time to spare!

Of course, if you are reading this you must have a little free time now and then, right?

The least time-consuming way to become a cosplayer is to buy your costume. Some people get snooty about bought costumes, but unless you are going around claiming to have made it yourself, there is nothing wrong with buying your cosplay costumes.

Buying a costume is an article in itself, but your three main choices are:

  • Commission it – more expensive, but more accurate to the source, and more likely to fit well. You can find comissioners on cosplay forums
  • Ebay (or similar) – cheap, but usually inaccurate to the source, and likely made in a Third World sweat-shop
  • Second hand – of variable quality and price. These can be anything from a bought costume that didn’t make the grade, to a much loved hand-made item that no longer fits.

As ever, when buying online check the seller’s feedback, ask others for their experiences, and try to get photos of the actual item (not stock pictures).

If you still want to make your costume, you might want to consider shortcuts. There’s lots of ways to save time when making costumes. Ranging from finding regular clothes that are close to what you want and adapting them in what little free time you have; all the way up to taking artistic licence with a design to make it simpler. If you are a perfectionist, or entering a contest, accuracy counts. But if you are just starting out, or are more interested in fun than faithfulness to the source, you can often drop fiddly details and still be recognisible as the character. And you can always correct these omissions at a later date, if you find the time or enthusiasm for accuracy!

If you are still determined to make your costume entirely, and have it 100% accurate to the source, then you are going to have to manage your time carefully. Can you sew while watching TV, or reading to your children? Do you have a room where you can leave projects half-done and come back to them when you are less busy? Can you paper-clay your armour and check in on it between hoovering each room of your home? If you don’t set yourself a deadline, you can even make your costume over the course of years, if having spare time is that rare.

With creative time management, or a little compromise there’s usually a way to fit cosplay in somewhere. There’s a catch though!

While there are lots of ways to get yourself a costume on a  tight time-budget, there is one thing I can’t help with; and that’s finding time to wear it. If you don’t have the time to get to conventions, media shows, film showings, or anime clubs you might have to consider pestering friends to make their celebrations fancy dress affairs!

Pandora: Costume progress – Tentacles Revisited

At the end of my last update I had four foam tubes with notches cut into them, and some wire cable twists. Thankfully the twists were the perfect size to slide into the centre of the tubes.

Look at that! Perfect fit!

They were also about the right length too. All four went into the tubes with any excess left sticking out on the end that will attach to the costume.

Here you can see the wire through the notches. These have been cut in to allow the tube to flex at a sharper angle than it would be able to normally. As the tubes are to be covered in fabric, it doesn’t matter that the core is visible.

At this point, the “pokey” ends of the tentacles were flat and didn’t really look right. Fortunately I had some spare upholstery foam, and carved some small lumps into rough hemispheres. Again, they didn’t have to be perfect as the end of the fabric covering would keep them in shape.

Making the fabric covering was actually the easiest bit of all. I just made long tubes with a single seam, and sewed a rounded end (like you would with a glove’s finger). Turning the tubes right-side-out was a little trickier as they were about a metre long, and only a few centimetres in diameter, but that was nothing compared to the undignified way I had to tug them onto the tubes!

And this is the finished tentacle

The covering is made from lime-green stretch jersey which allows it to remain snug despite bending and posing of the individual tentacles. These will be slotted into sockets on the costume, with the excess cable twist used to anchor it.

The flexibility of the wire core allows them to bend out of the way if I bump into anyone (or anything), and spring back into shape. They also have a slight bobbing motion as I walk, making them look alive!

But if you want to see the finished ensemble, you’ll have to look out at London’s May MCM Expo! (Or find the link for my Cosplay Island profile “hidden” somewhere on this blog.)

Goldie Neko: A Cosplayers Guide To Tube Travel

With MCM Expo little more than a month away I find myself upon my usual commute into London, Waterloo Station, pondering just how many Cosplayers have ever found themselves suffering unnessicarilly on their commute to Expo. Could that crack along you’re armour have been avoided by simply waiting for the next train, is there an easier way to ensure you don’t get muggles harassing you asking if they can try out your Halo Helmet? Well here’s Goldies guide to tube travel with your Cosplay in tow!

Let’s start with the basics, plan your route!

The TFL website has a nice handy journey planer which will give you a suitable route to the venue you want to get to and the estimated time it takes to get there. It also has the information in regards to any rail works due to take place on the intended day of travel. If you’re planning your route more than a month in advance I suggest checking back on it in the week running up to Expo (or Hyper Japan ect) to double check that last minuet changes haven’t been made that might obstruct your route.

When planning your routes count how many stops there are for each step of your journey and make note of them. Knowing this will allow you to figure out quick alternative routes if the need arises. For example say you want to get to embankment station from Euston but the Northern line is down. If the Northern line was working you’d only have to go through six stations including the station you departed from and the station you’d like to go to. Counting the stations as you go you can find several way to get to that station without using the northern line but you’ll want to use the way with as close to six stops as possible if not less to ensure you don’t add too much time onto your journey. But if you’ve planned out your routes beforehand it’s unlikely you’ll have to fret over rethinking a new way about the underground.

Have a second route! Needless to say it’s always better to expect the unexpected. Accidents do happen and sometimes you’ll have to change your route to get to the station you want to get to. Plan ahead and try your best to familiarise yourself with alternative routes you can use to prevent any unnecessary headaches.

If you find you’re not used to the underground, and it did take me a while to get used to it myself before moving to London, snag one of the mini tube maps at the station and keep it on you so you can double check it as you progress on your journey.

A Goldie Neko Golden Rule: It’s ALWAYS better to be half an hour early than half a minute late!

Plan your routes, leaving times and travels so you’re scheduled to arrive at your destination at least half an hour before you’re required to be there. This allows to any mishaps and difficulties you may have en-route  I’d honestly say that it’s also advisable to avoid travelling at stupid o’clock at night/morning after a hectic con and/or party and you’re already so tired you can barely carry yourself let alone your bag filled with Cosplay and other such goodies. Avoid the rush hour if you can, but sometimes it cannot be avoided so following some of the tips on your positioning and which carriage to get may prove useful. Though following them and getting those Cosplayer friendly “safe zones” does tend to be a lot harder during rush hour.

Having spent the past six months slaving over every detail, carving the foam of your staff, stitching each minuet detail in the fabric and ensuring the cables for those all so important LED’s is wired up properly you want to make sure you’ve got them packed away safely. Doing this you’ve also got to ensure you can manage to travel with the whole thing. Having ventured on the underground with several large cosplays by myself I find that doing the following can help.

Rolling up fabric pieces, this can actually save you a hell of a lot of space inside your main suitcase when done properly. For example, if you have a long coat that you’d normally have to put in it’s own specialised bag to stop things from getting caught up the sleeves or catching on your intricate hand sewing. You fold the coat in half so that the cuffs of the sleeves meet as if you were clapping your hands. Keeping it folded you bring the two sleeves to rest upon the front panel and roll the coat in on itself as tightly as possible. Needless to say this method isn’t for everyone, it does require a bit of practice, Tetris like placing in the bags and you will have to iron out your Cosplay when you take it out of the suitcase.

Now some people will have a soft bag, something similar to the old gym bags you’d have at high school. They’re long cylindrical and can come with wheels. A suitcase with wheels is a MUST for any Cosplayer in my view and I personally prefer having a suitcase with the more tradition hard outer casing than a plain fabric bag. Fabric bags can be ripped, torn and cut easier than a ridged case and don’t usually offer the same protection for the precious cargo within.

Try to find a suitcase with those handy zips that meet up together with a means of locking them. Such as two rings that overlap allowing you to place a lock through them. Pad locking the main compartment of your bag discreetly keeping the zip either on the side or lower part of the bag if possible gives you that extra peace of mind. Try not to place the lock bag on the top in the middle of your case, usually the furthest corner where the zip begins/ends is the best place to secure these types of bag.

If your bag doesn’t have this kind of zip don’t worry, you can be just as secure by keeping the zips in the upper corner closest to you so you know if it starts to slip when you’ve filled it up with all the goodies from expo alongside your Cosplay for your return trip back underground.

Also if you’re like me and have a hell of a lot of stuff to take to a con you can use backpacks, hemp shopping bags and the like to travel with. The bag for life bags can be slipped onto the handle of the average hard suitcases so that they sit quite nicely on top, these can have a life of their own though. So I do advise taping them to the handles with masking tape if you’ve got some spare and don’t be stingey, masking tape is easy to cut with scissors so wrap that bad boy up like an Egyptian mummy to ensure it stays put throughout your journey. It’ll really save you some hassle whilst you’re wheeling your bag along behind you.

Large props should always be wrapped up as discreetly as possible to not only ensure the safety of your prop but also to prevent curious strangers from asking if they could hold and play with your prop before you’ve even put your Cosplay on for that all important pre-masquerade judging. If you have any using bubble wrap is advisable, but it can be pricey if you have to head out and buy some.  Needless to say bubble wrap or not it is advisable to wrap any large props in black bin liners. I usually use the white masking/surgical tape to wrap around the bin bags tightly and string to make handles for anything too large to be strapped onto a bag. Such as large staffs, swords and other such props you might have. Be sure to pack extra bin liners, tape and string for the journey back as well as scissors as you’ll want to wrap up your props jut that right amount that you’ll have to cut them open! With the utmost of care of course.

Know your limits. Only you know how much weight you can carry, bare this in mind when packing and what kind and how many bags you want to take with you.

It’s always easier when you have a mate to help you out. Though I can honestly say they don’t appreciate it when you bash them in the balls with whatever props you just happen to have to hand.

Picking your carriage. It’s safe to say you’d be better to avoid the middle carriages and any that happen to line up with the main entrance/exit of the station you’re leaving from. Personally the front and back carriages always seem to be the quietest, though this can vary on each line depending on where you’re departing from.

Each carriage is made up pretty much the same way. The ends, with the connecting doors to the other carriage or the drivers’ compartment and the middle section with the gap or fold up seats for wheelchair users and the like. This is the second you want to be aiming for. In an ideal world you should aim to get the fold up seat closest to the doors of the train on either side and use the space next to it for your suitcase.

A Goldie Neko Golden Rule: These seats are intended for those who have difficulty standing. If you see someone who should really be sitting out like an elderly pensioner on crutches who just came out of the eye hospital to have their retinas checked then for the love of god stand up, shuffle in front of your bags and give them your seat! If you’re lucky one of the seats next to the fold up seats might be free allowing you to sit back down next to your bags. Good manners and common courtesy never go a miss and yet seem so damn rare these days!

If for some reason you end up in the end part of the carriage the best place to situate yourself is by the door that connects each carriage. You know the one with the little slide down window which can be so glorious on a hot summers day when the big tall guy next to you has just happened to have forgotten to wear deodorant and is insistent on holding the bar overhead.

A Goldie Neko Golden Rule: NEVER Make the leap of faith! We’ve all had that moment, the lil beep of the doors closing sounds you think you can make it. As tempting as it may be I highly advise NOT to rush into it and risk the wrath of the tube doors. Unlike lifts these doors do not take any prisoners! They will do their utmost to come to a close and crush anything obstructing them from doing so, even your finely crafted rainbow dash skull you spent ages to get just right for your Brony shoot that very same day!

As mentioned earlier you may not always be able to snag these Cosplay friendly “Safe Zones” on the tube. Though it’s best to avoid slipping into the space in between the seats in the middle of the carriage. If you can get one of the spots already mentioned then try to squeeze up as close to the door where you can have a makeshift corner between the doors and the pane of glass shielding the upper/lower seating area of the train. Again get your bag in this corner and place yourself in front of it. Always ensure that you have some kind of physical contact with your bag, even if it’s just the side of your leg or shoe. Trains do jiggle about quite a bit and the last thing you want is for your bag and the packages so lovingly tied to it to tumble down onto an angry chavs foot.

And the parting word for this little set of tips is the most basic of all things. Be sensible and use common sense! If you feel uncomfortable travelling with a large Cosplay on your own, arrange to meet up with some friends and travel together. If you find yourself in a situation where there are people on the tube you’d rather no be around, such as drunkards or just a stupidly busy carriage. Get off at the next station and wait for the next train, it’s rarely more than five minuets behind the one you’re already on and will most likely be a little bit quieter if you’ve timed it right and used your head to figure out which carriages will be the quieter ones for you to step onto.

Hope this has given y’all a better idea on how to make travelling a bit easier to and from London based cons. Most of it is just stating the obvious but sometimes the obvious way will be the easiest way to go about doing things.

~ Goldie Neko

Pandora: I Can’t Cosplay Because… I’m too tall/short/fat/thin/old/young

No you’re not. You want more than that? OK, lets break it down. It’s entirely possible that you might not be suited to a specific character – a tall slim woman might want to reconsider cosplaying Thorin Oakenshield, in the same way that a short fat man might not want to dress up as Yoko Littner – but there is no body-type or shape that is completed unsuited to every cosplay. First up, if someone is rude about you, or your costume, whether that’s at events or online, they probably aren’t a very nice person. Or they are succumbing to peer-pressure. Either way you can safely ignore their comments. The only type of criticism you want to listen to is constructive criticism about the costume itself.
Height is an easy one to deal with. In general there is nothing stopping you being a tall hobbit, or a short Na’vi. If you are exceptionally tall or short, and your character is the opposite, you may want to reconsider if you are going to be part of a group. But you don’t have to. If you have the confidence, you can just deal with it, but you can also use trickery to disguise your height. High heels and platform shoes make you look taller. Stooping, or wearing a wider costume can make you look smaller. And if you are being photographed you can use perspective to your advantage.

  • If you stand slightly forward or back from a line of people you will appear taller or shorter than you are.
  • If you sit, kneel, or even lay down in front of a group, your height won’t be so obvious
  • Being photographed from above makes you look smaller
  • Being photographed from below makes you look taller.

Weight and build is a little trickier. Being particularly over or under weight can affect your confidence, and confidence is a key part of appearing in public dressed outlandishly!  But unless your costume exposes part of your body your are embarrassed by, there’s nothing to stop you cosplaying as anyone you choose. By BMI standards, I’m morbidly obese, but that didn’t stop me being Hetalia’s Belarus or Queen Chrysalis. You can also use artistic license and make changes to the costume to compliment your body – lengthen or shorten hemlines, adjust the waistband and top to add/remove a bare midriff, replace a minskirt with shorts, use padding to change the shape and proportion of your body, and so on. Adjusting your height with the techniques above will also affect perceptions of your build, and tilting your head back or forward will change the shape of your face subtly. To my fellow plus-sized cosplayers I also recommend corsetry and shapewear. Elasticated and fitted underwear will not only smooth out any lumps and bumps, but it will boost your confidence too, and that will also affect people’s perceptions of you!

Age is a slightly easier one to overcome. If you are still a child, or are so wrinkled you look like a pug, you might want to factor that into your costume. But there is no age limit to cosplay. I’ve seen babies dressed up to match their parent’s costumes, and at 30-something I’m not the oldest cosplayer I know (although older cosplayers are somewhat rare, its still a fairly modern hobby in the UK). If you are cosplaying as a character significantly older or younger than you, you can alter your appearance with a good wig and makeup, but you don’t have to. As long as you are old enough to get around, you can cosplay.

I’ve often joked that I’ll cosplay as Kiyuro Takazawa if I get too old to get out of bed

As long as you are physically able to wear a costume, there’s no condition that can stop you cosplaying. Even disabilities can be worked around! I’ve seen wheelchair-bound cosplayers dressed as Professor X, The Little Mermaid, and even a Hells Angel by a woman that added a false motorbike wheel and forks to her wheelchair. And I know active cosplayers with less visible impairments that with a little planning and forethought, still cosplay at a competative level! Ignore the haters and cosplay as who you want. Keep your head up, have fun, and be an inspiration to others!

Pandora: Costume progress – Tentacles!

For the May 2013 London MCM Expo I’m working on an original character costume and I have need of four alien tentacles.  This isn’t a prop I’ve worked with before, and I’m still pretty new to cosplaying, so I’m learning as I go.

My first step was to work out what I wanted from them. Obviously they had to be tubular, but they also had to have some flexibility, fit into my suitcase and be durable enough to survive Expo! My original ideas and designs all featured a wire support running through the centre, with some sort of padding and covering. But after lots of visits to craft, sewing and DIY centres and websites I was at a loss for the padding side of things.

Thankfully I stumbled upon polythene pipe insulation! If you are not familiar with the stuff, it’s an expanded plastic foam shaped into hollow tubes. It’s tough by design, but also really flexible, and easy to cut into shape. With the support and structure it gives, I won’t need the wire armature, and a stretchy fabric cover can be pulled over the top.

Hand holding polythene pipe insulation

That’s the stuff!

Once I knew the properties of my materials I was able to start doodling. I sketched a bunch of different layouts for them; looked on Wikipedia for octopus, squid, and other tentacles; and scribbled some designs for the tentacles themselves, and the tips. I’ve settled on a smooth plain look, and a rounded tip. Suckers and pads could be nifty, but would limit my options for moving them around and swapping them about on the day.

I’m currently at the stage of getting the tubes into shape. For the simpler tentacles I can just bend them. The plastic responds well to folding, and retains a shape reasonably well. But for the curvier, exploratory tentacles, I need to do some work.

Pipe lagging with notches cut out

My work in progress

I laid the tubes out on the floor this evening and bent them into the shapes I wanted taking note of where the foam deformed as it bent. I then snipped out wedges from the foam (as seen in the picture above). I’m going to flex the tube and glue the edges of the wedges together to create a sharper bend. I may also tape around the joints to give them more support. But this will have to wait until I can get some impact adhesive, and we get a day with reasonable weather – you need good ventiliation working with adhesives, and it’s been a bit damp to work outside or open the windows!

I’ll post up some more pictures when they are fixed in place, and explain a little more about how I’m going to wear them.

UPDATE: I have abandoned the glue for something better: Twist Ties! Designed to secure things to roof racks, these are about a metre of flexible wire, coated with rubber and capped with a rounded plastic bung. They are firmer than the pipe lagging and fit nicely inside. All I need to do is cut my notches and bend. With the added advantage of being able to vary the bends, or move them around during the day.

Next step: the fabric covering!

Pandora: Boobs for beginners

If you are a guy planning on crossplaying, one of the hurdles you will have to get over is that you probably have no boobs! It’s not an issue if you are dressing as a youngster like Carcaptor Sakura, or a flat-chested tomboy (like Lina Inverse), but for everyone else you need some assistance.

Unless you are wearing an incredibly structured costume, or one with chest-padding already built in, the first thing to look at is a bra. If you are lucky, you might be able to snag an offcast from a friend, partner or relative, but otherwise you are stuck with buying. Don’t despair though, charity shops, supermarkets, eBay and discount superstores can all help you out with cheap and/or anonymous ways to buy. But what of the arcane sizing codes? What do 32C, 44DD, and 28A mean?

Sizing is actually easier for a guy. Simply measure your chest under where the boobs will go. The length in inches is your band size. That’s the number part of the 32C or whatever. Bras are only made in even sizings, and as extenders can be bought, its generally better to round down here. A woman would have to do more sizing to work out the cup size (the letter), but you can choose yours based on the character. A-cups are quite small. If your character wears loose or baggy tops, you might not even need to worry about faking bosoms! The B, C and D cup are the averages from small-ish to big-ish. C will probably do for your average anime character. After D comes DD for some reason. And then we get the very large ranges from E all the way up to L in some stores! For anime cosplay these are ideal for hentai or comedy characters. (For real women these are the realms of chronic back pain, and serious difficulty buying pretty and affordable bras!) Once you’ve selected its time to start shopping!

HOTD
Shizuka Marikawa from High School of the Dead will not find bras on the High Street!

There’s lots more I could go into here about shapes and styles, but all you really need to do is make sure the bra isn’t visible through the material of your costume (colour match for safety!), and doesn’t show at the edges of the neck/cleavage line. Unless you are cosplaying as a hentai or flirty character of course 😉

Now you have your bra, it’s time to fill it! There’s a few options here ranging from free to second mortgage. And which you go for also depends on what you want from your falsies.

Stuffing
At the cheapest and easiest end there simply stuffing your cups with woolly socks or a fleecey scarf. Lots of volume, and very little weight. They won’t move about like real boobs (or feel like them!) but that shouldn’t be a problem if you are just posing for pics, or you don’t worry about looking feminine. I used this method initially and its fine for beginners. Technicaly you can also use cotton wool or tissues but thats not very convenient or comfortable.

Foam
If you have some upholstery foam and a good foam-cutter, you can actually sculpt your own. There are also drag suppliers that sell nicely sculpted foam boobs, although you might be looking at over £20 a pair. Either method will make more secure and better fitting boobs than stuffing. Still no movement, but they’ll feel better. I’ve not used either, but I have friends that swear by the pre-sculpted foam inserts.

Rice or Millet
Don’t laugh! This is the method I currently use. It was suggested to me by a friend who was undergoing transitioning. You simply take a pair of stockings or tights, and fill the feet with rice or birdseed – use the cups of your bra as a guide here. Tie off the excess (and remember to cut them apart if using tights!) The downside of this method is the realistic weight, and needing a well-fitting bra so they don’t fall out if you bend over. But they mould themselves to the shape of the bra-cups, and they jiggle convincingly if you want to give some fan service. I said don’t laugh Luna!

Silicon
If you have money to burn, or simply want the professional option, drag suppliers can also outfit you with silicon boobs. Realistically coloured, complete with nipples, and often with adhesive backs so you might not need a bra, these are what you want if any part of the boob is to be visible through your costume. But they are really expensive. Prices start over £100, and can range into the thousands if you want hyper-realistic cleavage.

Other enhancements
Those are the basics, but other things to consider are “chicken fillets” (silicon padding to enhance what you already have), masectomy bras (which come with “pockets” you can slip padding into), and “Two Sizes Larger” bras that have gel pads that can turn a flat chest into a B-cup, or any of the above into a jaw-dropping rack! If your saw my Queen Chrysalis at the London October Expo 2012 you would have seen the effect this had on my rice C-cups!

DDs

The implausible boobs you can make with padding and some rice!

Luna: First steps of making a cosplay

Everyone ask’s “Where do you begin when you make a cosplay?” well like any project you should research, gather all of the information about the character you can. Reference Pictures, Character Biography, Screenshots, play the game or watch the anime or movie. Or read the book. If you cosplay from and RPG read the lore. Why? This is all an important part of cosplay, you need to know your character inside out, you need something to work from for both the “costume” and “play” part. I have always found knowing Lore and other such background details helped with picking fabrics and other materials.

What to do with all this information? Print it off if you can having it with you if you are being judged for competition helps judges understand why you have constructed your cosplay the way you have. If you can’t? put it all in a word document together, put it in a folder together on your computer, don’t worry usually when you fill in competition entry forms they allow you to send in images too. But you need all this information in one easy to access place all the time during the construction of your cosplay, its vital you keep referring back to your reference images.

So you have all of your reference images now what? Well I guess the reason why making a cosplay takes so long for me is because of a few vital steps I always like to make. Once I’ve gathered all my images etc.  I like to get a sketch pad out and sketch all the details, even if it is just the prop. I feel this way I get to know what I’m doing I get a feel for shapes, and by drawing it I get a feel of how I can construct things, for instance  take my Aion Cosplay, that back ring was drawn 4 times over before I was happy.

I’ve already drawn the dagger I want to make for my Current Aristocrat Cosplay from GuildWars2

Not to worry, The frame-work for my Aion wings I made was only drawn once before I started making them, however I did make a paper pattern for the structure to see if it would work like I wanted to. However thanks to my research I was able to find tutorials on articulate wings which really helped  with what I wanted to do.

Before you go ahead and buy your fabric you need to know how much you need! even if it is a rough estimate. The best way to do that is measure yourself and make a pattern! Now from experience I am not the best person to explain how to make a pattern. However if you are new to sewing or construction, a pattern is a paper or card pieces like a jigsaw that when all put together will make your costume. Another word for it would be Template. I will let you read this article HERE it would be easier. You can buy patterns, but you will sometimes find you will have to modify them (or you can use similar clothes you already own to make your pattern), this is generally the best move if you have not made one before. I tend to make mine from old newspapers (A number one must have in any cosplayers craft box!). Once you have a pattern I usually lay mine out in a line (about 1m wide) with about 2 inches between each piece (this allows for hems) then I measure how long it is, this roughly gives me an idea how much of the fabric I need, I do this for each colour of fabric I need and I always give myself about 1 metre extra of fabric in case something bad happens (and it does). I have had a few times I have bought fabric without doing this, and I have bought 3 metres too much. Other times I have done it and not bought enough!

Once I’ve done all the above I go out buy everything I need and get stuck in! I find it’s better to buy as many materials as I can in one go, it helps the flow and I don’t get frustrated as much about not having a certain thread colour or “I can’t finish this piece I need this.” I hope this has helped a few starter Questions and a few puzzled heads when I say “I’ve started my cosplay” but not actually got anything physical to show for it. I have written bullet points below just to sum up everything/the stages in this post including a few things I may have missed.

  • Collect References
  • Collect Background information/Lore
  • Look up any tutorials that might help with construction
  • Draw any large or small detailed areas that will be “constructed”
  • Make a pattern
  • Test the pattern see if it works
  • measure the pattern see how much Fabric you will need
  • Research fabric types you will use.
  • FABRIC/MATERIAL SHOPPING \o/
  • Start construction

Luna: Sweet Sweet Loot: Earrings

I love it when my character says that in GuildWars2 it usually means I have some exotics to put on my character!  This is no different. I noticed when I chose my cosplay she has earrings. This is really unusual, most of the time ears are covered in hair or armour or they don’t have earrings. so for the first time I decided not to buy anything to do with this costume everything shall be hand made 100%  even the earrings! So here I shall tell you my simple Earring method whilst sticking to the lore of the game as my reference images didn’t really give much of an indication to what the earrings are like except green pixels and circles.

LORE: To Create a master earring in GuildWars you need to make a Setting, a hook, a filigree, and you need a gemstone of choice. according to what stats you have.

So I bought according to level of the armour Silver hooks, Silver Filigrees, Glass beads and Wire Settings. to create these. I bought mine off eBay for 99p for 100 (for each part) that leaves plenty of room for mistakes. They are simple to put together though. Take your central setting wire, thread on a bead, thread on the filigree then thread on the hook and wrap the remaining wire around to hold it all together. I closed my filigrees up a bit as they were way too big for my beads.

Master Sapphire Silver Earring

If you don’t have pierced ears its no issue you can buy magnetic earring studs just the same.

Once I had made one pair I realised just how easy it was to make them I found myself making pair after pair and eventually made the green ones for the costume, however in my reference images she doesn’t have 2 identical earrings one is short the other long and hangs on her shoulder a chain of beads with a circular piece at the bottom, so I will be using a similar technique for it, I will still have the hook at the top with the filigree, but I will use normal wire which shall go through my chain of beads through a small hold in the top of the circular pendant and back up through the beads to hold it all together and keep it neat rather than having a scruffy joint at the bottom. I will post another picture once I have made this one too.